- Home
- About Us
- Machines
- Cups & Containers
- Support
- Contact Us
- Customer Portal
Service Bulletin: SB 208.1
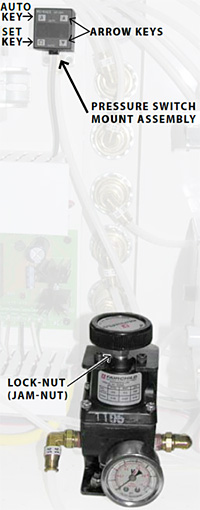
Subject: Cup Diverter Regulator System Set-up Instructions — Leak Detector System Upgrade
Recommendations:
 Paper Machinery Corporation has successfully trialled a new regulator system for the leak detector. This upgrade eases the sensitive set up and maintenance of current PMC-1002 regulator systems. See below for available retro fit parts.
NOTE: All functions are displayed in continuation using the set key.
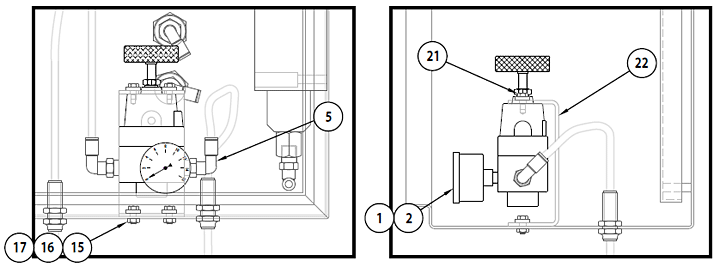
The following parts are now available as a retro fit:
Assembly #824-410
Reference Drawing #417-558
| [1] | FT-10940 | Regulator, Air , Precision, 1/4 P, 0–10 Fairchild | 1 ea |
| [2] | FT-10295 | Gage, Pressure , 0–15, 1 1/2 dia | 1 ea |
| [5] | FT-13160 | Elbow, Male, Swivel, Push -In, 1/4 T × 1/4P | 2 ea |
| [15] | SC-11053 | HHCS, 10–32 × 1/2 | 2 ea |
| [16] | WA-10040 | Washer, Flat, PMC, #10 | 4 ea |
| [17] | NT-10328 | Nut, Hex, Full , 10–31 | 2 ea |
| [21] | SC-11047 | HHCS, 10–32 × 3/8 | 2 ea |
| [22] | 226-659 | Bracket, Regulator | 1 ea |
CONTACT: Parts orders and customer communication can be made using telephone, FAX, or e-mail. Contact can still be made using the main telephone switchboard at 414-354-8050 or FAX number 414-354-8614. Sending a FAX directly to the Service Department, at 414-354-1710, will convey a faster response. If using e-mail and no response is made within 3 working days, please contact via phone or FAX.
Parts orders can be directed to Holly Warner or Vicky Alcaraz using telephone, FAX, or e-mail. Please make sure to carbon copy (CC) both Holly Warner and Vicky Alcaraz in all e-mails containing parts orders. Service issues can be directed to Steve Evans or Mike Ferguson and electrical issues to Larry Spencer.